When it comes to sudden cardiac arrest (SCA), seconds count. The American Heart Association reports chances of survival decrease 10% for every minute cardiopulmonary resuscitation (CPR) is not performed after SCA occurs. On the other hand, immediate CPR can double or triple a person’s chance of survival. What do these statistics point to?
Public education and use of CPR has the ability to save countless lives each year in the United States, if we only take the time to equip ourselves with the knowledge and tools to use it. The best part? CPR can be used anywhere and at any time, and the only equipment needed is YOU! Interested in learning how you can help save a life with CPR use? Follow along as we lay out 4 easy steps to performing CPR:
Note: Living for Zachary recommends all persons ages 12+ attend a CPR certification class to learn and test their CPR skills with a certified instructor. CPR classes may also teach students how to use the compressions + breaths method of CPR, which is recommended by the American Heart Association for use by those who are trained in it. This step-by-step guide will cover hands-only CPR use1.
STEP 1: Confirm the need for CPR
Kneel down next to the victim and tap them brusquely on the shoulders, yelling, “Are you okay?” A SCA victim will exhibit a loss of consciousness, no breathing, no pulse, and no response. These are key signs that CPR is needed. Immediately call 911 and prepare to begin performing CPR. If another bystander is with you, have them call 911 and give exact location information while you begin performing CPR.
STEP 2: Prep for CPR
Move the victim’s shirt and undergarments up over their shoulders to reveal their bare chest. If needed, cut any clothing off with scissors. Clothing can be replaced, but a human life can’t! Performing CPR on a bare chest ensures nothing is in the way of proper technique.
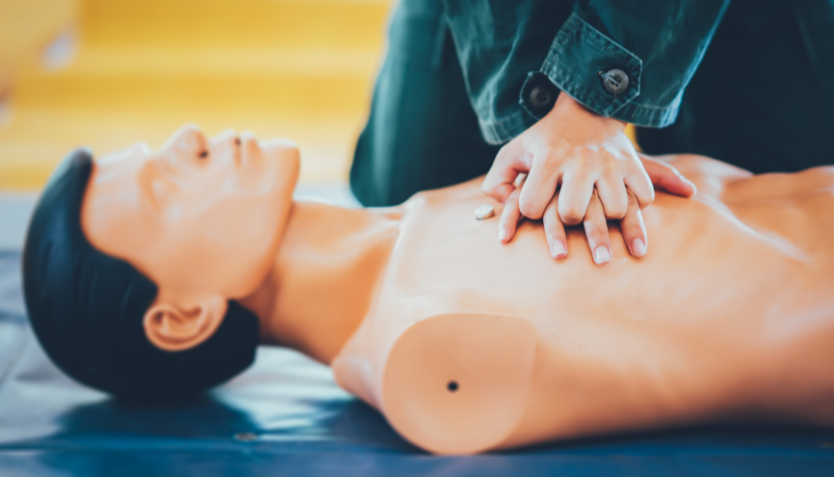
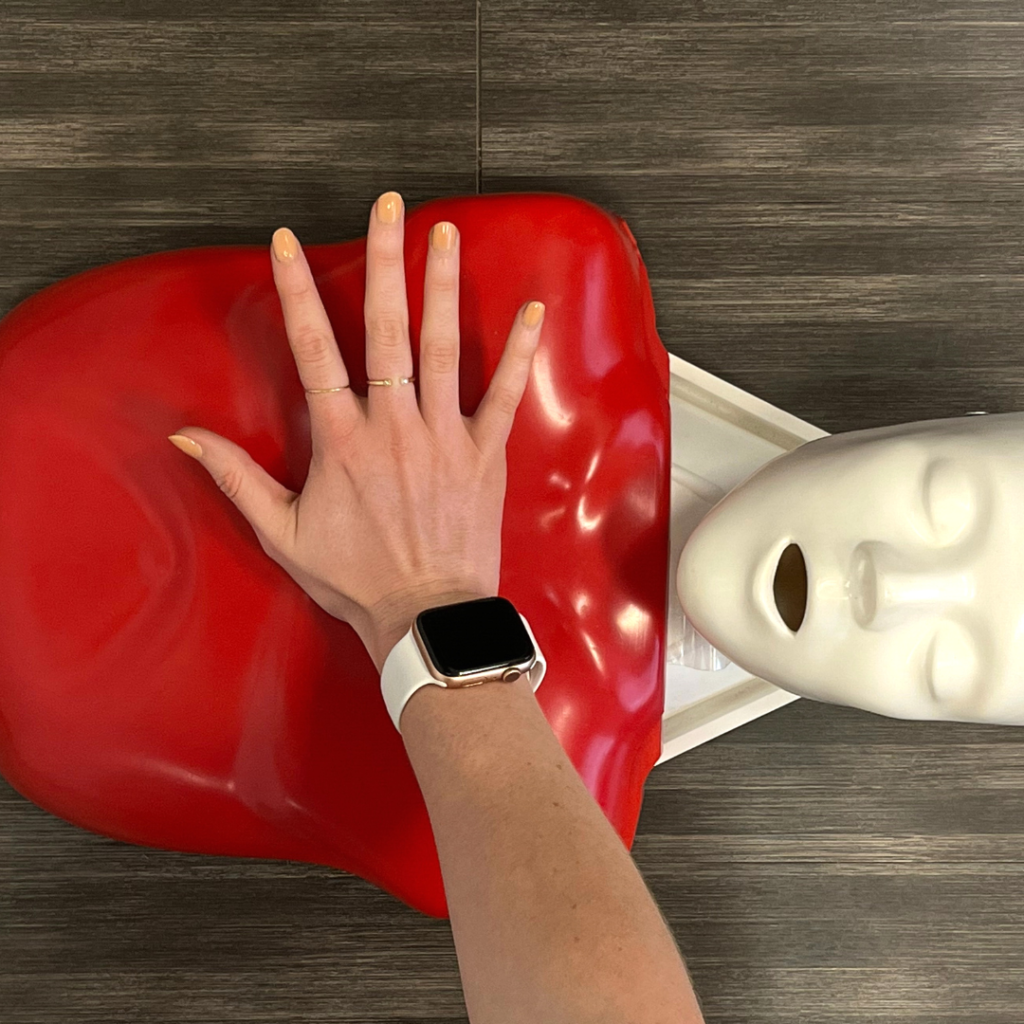
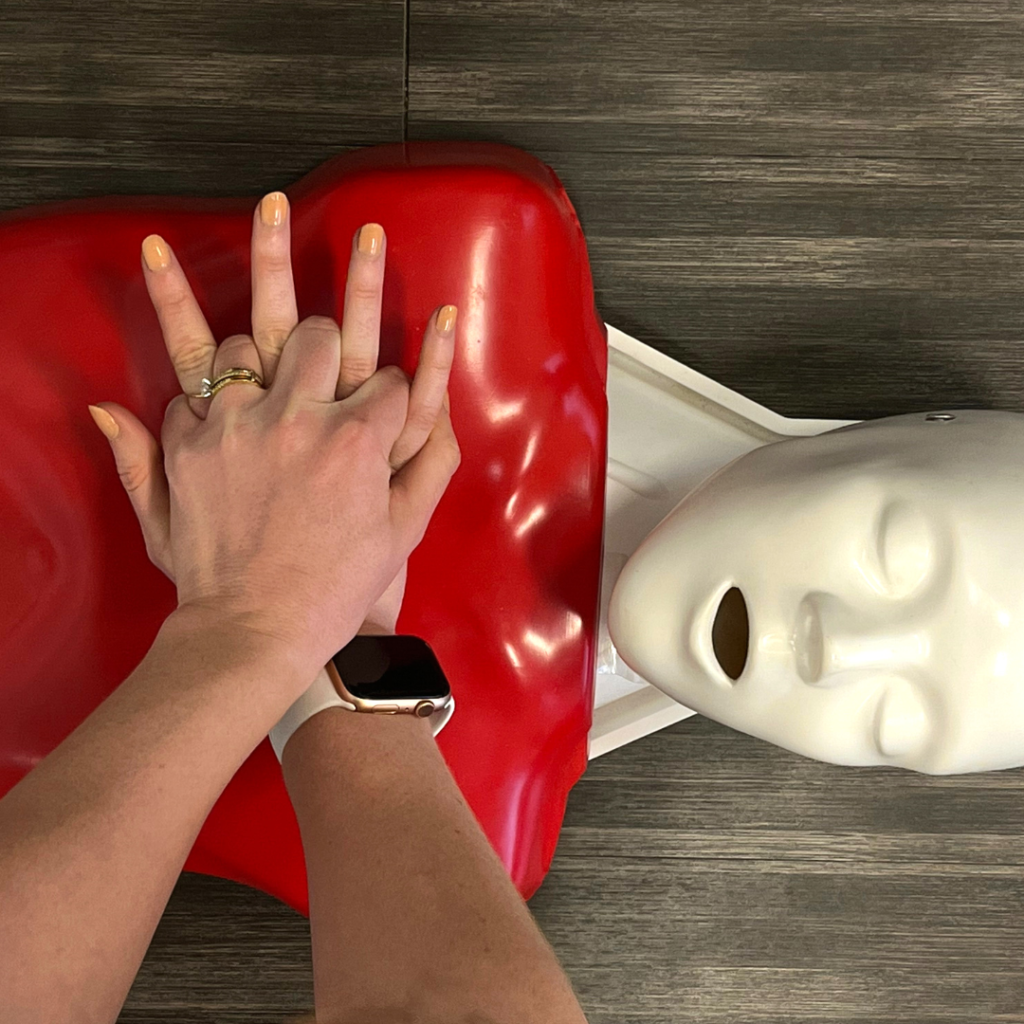
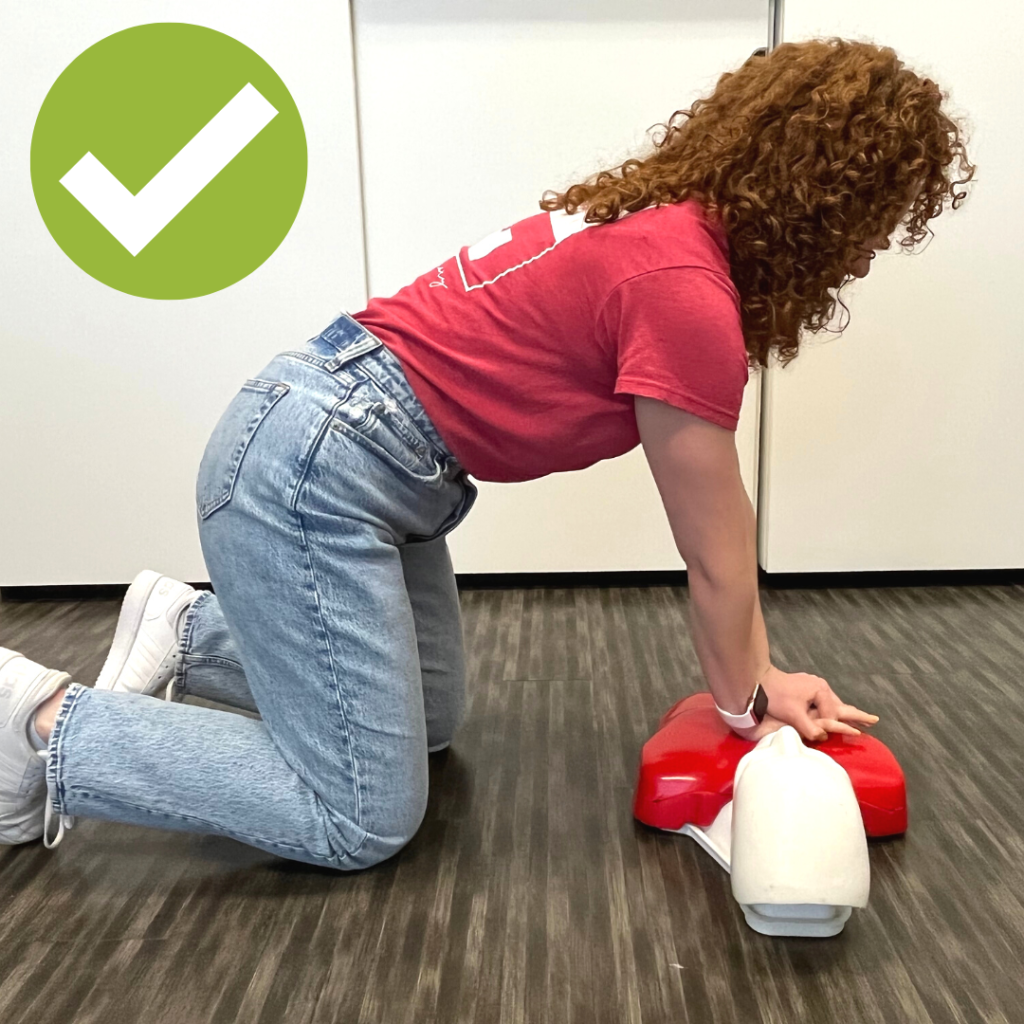
STEP 3: Begin compressions
Kneel on one side of the victim. Take the heel of your dominant hand and place it on the center of the victim’s chest, on the breastbone, with fingers extended. Then, take your other hand and place it on top of the dominant hand, interlacing your fingers. Your hands should create a solid block that can push on the chest vigorously.
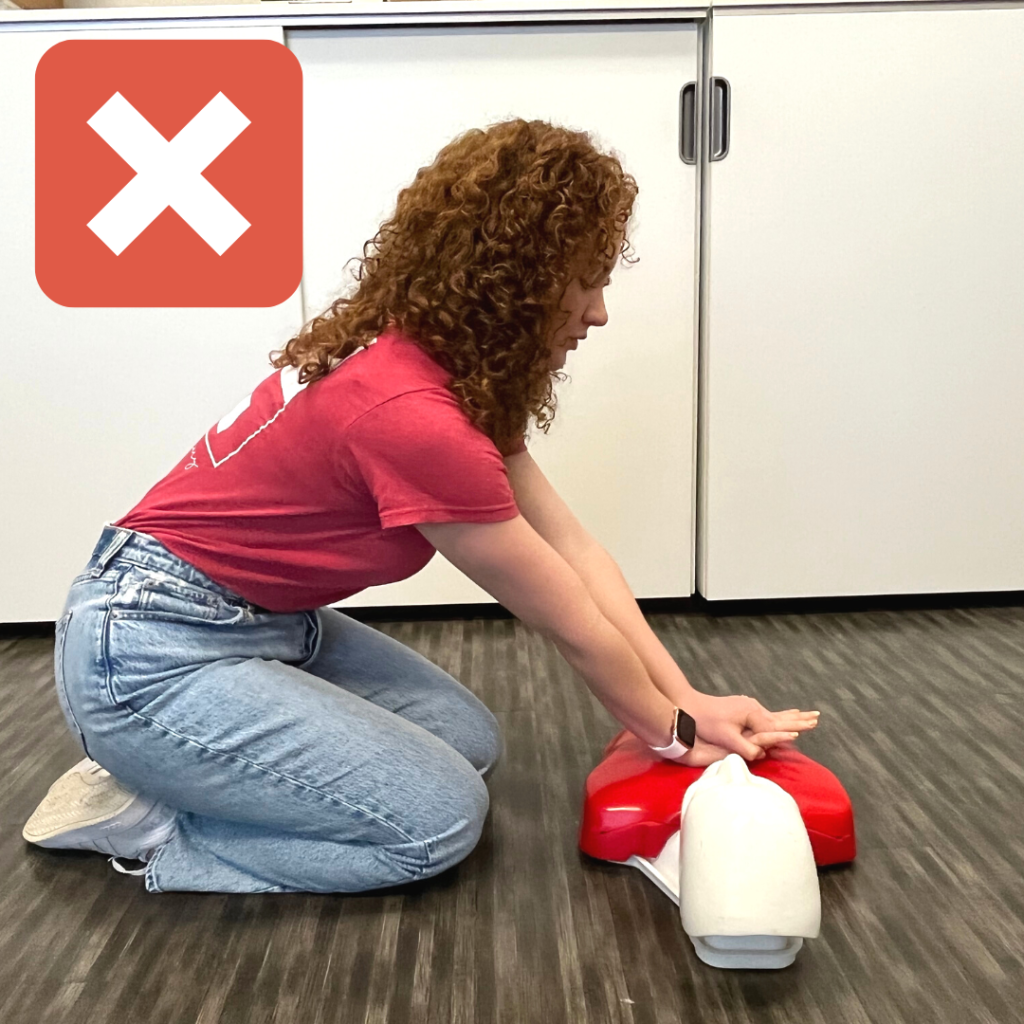
Begin chest compressions at least 2 inches deep and at a speed of 100-120 beats per minute (Stayin’ Alive by the Bee Gees is always a great song to remember this pace!). Make sure you are not leaning back on your feet and are positioned directly over the victim’s chest with your arms locked into place.
Do not stop compressions except to quickly switch off with another bystander, or to let paramedics take over. CPR is physically and mentally taxing, and it can help to take turns performing compressions with another person – just be sure to complete the switch quickly so compressions can be continuous.
Note: In the event of sudden cardiac arrest, always check to see if an AED is nearby and can be retrieved to use on the victim. Immediate CPR coupled with AED use can increase a SCA victim’s chance of survival. Check out our step-by-step guide to AED use here.
STEP 4: Continue compressions until further help arrives
Continue performing CPR as long as needed until professional medical help arrives. Your compressions will help blood to continue pumping from the heart throughout the body to vital organs, essentially acting in place of the heart while it is in cardiac arrest. Simply put, your compressions can save a life!
Key Takeaways
No matter how confident you feel in your ability to perform CPR, it can be hard to anticipate exactly how you will respond in a cardiac emergency. Taking part in a CPR certification class gives you the ability to practice your skills numerous times while receiving feedback from an instructor, and ask any questions you may have about specific scenarios. There’s no such thing as too prepared when it comes to saving lives from SCA!